Mastering the Mortise and Tenon Joint
The mortise and tenon joint is a cornerstone of traditional woodworking, revered for its strength and durability. For centuries, craftsmen have relied on this joint to connect pieces of wood at right angles, creating everything from furniture frames to timber buildings. While modern power tools offer speed and convenience, cutting a mortise and tenon by hand remains a skill that many woodworkers aspire to master. This article provides a detailed, step-by-step guide to cutting this joint with precision using hand tools, along with common pitfalls and how to avoid them.
The process begins with careful layout and marking, then proceeds to cutting the tenon and chopping the mortise. Each stage requires attention to detail and a methodical approach. By following the techniques outlined here, woodworkers can achieve a tight, well-fitting joint that will stand the test of time. Whether you are a beginner or an experienced woodworker looking to refine your skills, this guide offers practical insights drawn from traditional practices.
Understanding the Mortise and Tenon Joint
At its core, the mortise and tenon joint consists of two parts: a rectangular hole (the mortise) cut into one piece of wood, and a matching projection (the tenon) on the end of another piece. When assembled, the tenon fits snugly into the mortise, and the joint is typically secured with glue, pegs, or wedges. The strength of the joint comes from the large surface area of the tenon that is in contact with the walls of the mortise, providing resistance to twisting and pulling forces.
There are many variations of the mortise and tenon, including through, blind, and wedged versions. The choice depends on the application and aesthetic preferences. For example, a through tenon extends all the way through the mortise and is often visible on the outside, while a blind tenon stops inside the mortise and is hidden from view. Each type requires slightly different techniques, but the fundamental principles of precise layout and careful cutting remain the same.
Before beginning, it is essential to select appropriate wood. Hardwoods such as oak, walnut, and cherry are commonly used because of their density and workability. Softwoods can also be used, but they require sharper tools and greater care to avoid crushing. The wood should be dry and stable, with straight grain, to minimize movement after assembly.
Layout and Marking
Accurate layout is the foundation of a successful mortise and tenon joint. Begin by marking the location of the mortise on the workpiece that will house it. Use a marking gauge to scribe lines at the ends of the mortise, transferring the exact dimensions from your design. A marking knife or a sharp pencil can then be used to define the width of the mortise, which should match the thickness of the tenon.
For the tenon, mark its length, and then scribe lines around the entire perimeter of the tenon using the same marking gauge setting. Consistency between the mortise and tenon markings is crucial; any discrepancy will translate into a poor fit. Using a cutting gauge for the shoulder lines can help produce cleaner cuts, but a marking gauge set to the same depth is sufficient for most work.
It is also helpful to mark the center point of the tenon on its end, as this guides the sawing process. Additionally, always mark the inside faces of the joint—the ones that will be hidden—since they serve as reference points when assembling the joint. Remember to use clear, visible marks, and re-read your measurements before cutting to avoid errors.
Cutting the Tenon
With the layout complete, the next step is to cut the tenon. Start by sawing the cheeks (the broad faces) of the tenon. This is typically done with a tenon saw or a dovetail saw, both of which have fine teeth and a stiff back for accurate cuts. Place the workpiece securely in a vise or against a bench hook, with the saw kerf just inside the waste side of the marked line. Saw down to the shoulder line, keeping the blade vertical and following the layout lines precisely.
After cutting both cheeks, it is time to remove the waste material between the cheeks. This is achieved by making several vertical cuts with a coping saw or a fret saw, staying close to the shoulder line but not crossing it. Then, use a chisel to pare away the remaining waste, working from both sides to avoid tearing the wood. The goal is a smooth, flat surface for the tenon shoulders.
Next, cut the shoulders—the edges that will butt against the mortise piece. Hold the saw horizontally and cut along the shoulder lines, being careful not to saw below the line. A sharp chisel can be used to trim the shoulders for a perfect fit later. The tenon should now be ready to be fitted to the mortise, but it is often prudent to wait until the mortise is chopped before making final adjustments.
Chopping the Mortise
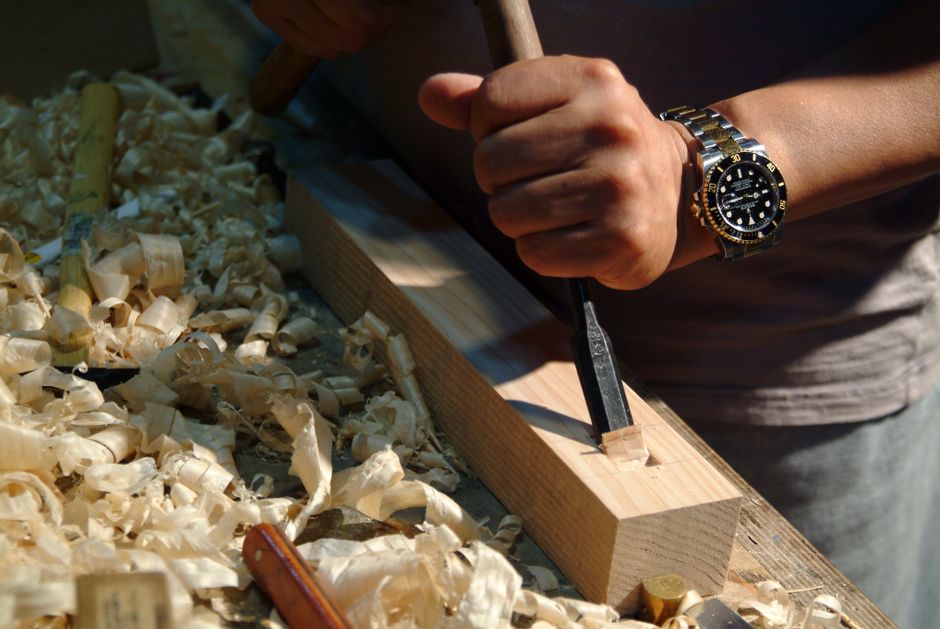
Chopping a mortise is a process of removing wood in a controlled manner. Begin by selecting a chisel that matches the width of the mortise—ideally the same size or slightly narrower. With the workpiece secured, place the chisel vertically at one end of the mortise, beveled edge facing inward, and strike it with a mallet to cut down to the desired depth. Then, move along the length of the mortise, making overlapping cuts about 3-5 mm apart, until the entire length is chiseled to depth.
After the initial chopping, clean out the mortise using a chisel as a lever or with alternating cuts from both sides to ensure a flat bottom. For a through mortise, carefully chisel from both surfaces to meet in the middle, leaving a clean opening. The walls of the mortise should be straight and square, which can be checked with a try square.
An alternative method for creating a mortise is using a router plane to clean the bottom after chopping. While this is a hand-tool technique, it can be effective for deep mortises where accuracy is critical. However, for most projects, the traditional chiseling method is sufficient and offers greater control.
Fitting and Assembly
The trial fitting stage is where precision truly matters. Begin by testing the tenon in the mortise—it should fit tightly but not be forced. If the tenon is too thick, pare it down with a shoulder plane or a chisel, working gradually and checking frequently. Similarly, if the mortise is too narrow, carefully trim its walls with a chisel, but remember that removing wood from the mortise is harder to reverse, so proceed with caution.
Once the joint goes together without excessive force, check the squareness of the assembly using a try square. Any gaps or misalignments can be corrected by adjusting the shoulders or the sides of the tenon. It is not uncommon to need several rounds of fitting, but patience at this stage pays off in a seamless joint.
Before final assembly, consider the influence of wood movement. Since the joint is likely to be glued, ensure that the surfaces are clean and free of dust. Apply glue sparingly to the tenon and the walls of the mortise, then clamp the pieces together, checking alignment. If using pegs or wedges, do so after the glue has set partially. Remember that the final strength of the joint depends on the quality of the fit and the gluing technique, not on force.
Common Mistakes and How to Avoid Them
One of the most frequent errors is marking inaccurately, leading to a joint that is either too loose or too tight. Always double-check your measurements, and use the same gauge settings for both parts of the joint. Another common mistake is sawing off the line, especially when cutting the shoulders. Using a sharp saw and a steady hand, and sawing on the waste side of the line, can help prevent this.
In the mortise, chiseling too aggressively can cause the wood to split, especially near the ends. To avoid this, always chisel towards the center of the mortise from both ends, and be careful when removing waste near the edges. Additionally, it is easy to undercut the bottom of the mortise, leaving it uneven. Using a depth stop on the chisel or marking the depth on the chisel blade can help maintain a consistent depth.
Another common issue is that wood movement can cause a joint to loosen over time. While this is a natural phenomenon, proper techniques such as allowing for seasonal expansion and using suitable fasteners can mitigate it. Finally, rushing the fitting process is a mistake in itself; taking the time to achieve a precise fit is essential for a strong joint.
In the hands of a skilled craftsman, the mortise and tenon joint is more than a connection—it is a testament to precision and tradition.
Mastering the mortise and tenon joint is a rewarding endeavor that combines skill, patience, and a deep understanding of wood. By following the steps outlined in this guide and being mindful of common mistakes, woodworkers can produce joints that are both functional and beautiful. Remember that practice and attention to detail are the keys to success.