How to Apply a Perfect Shellac Finish
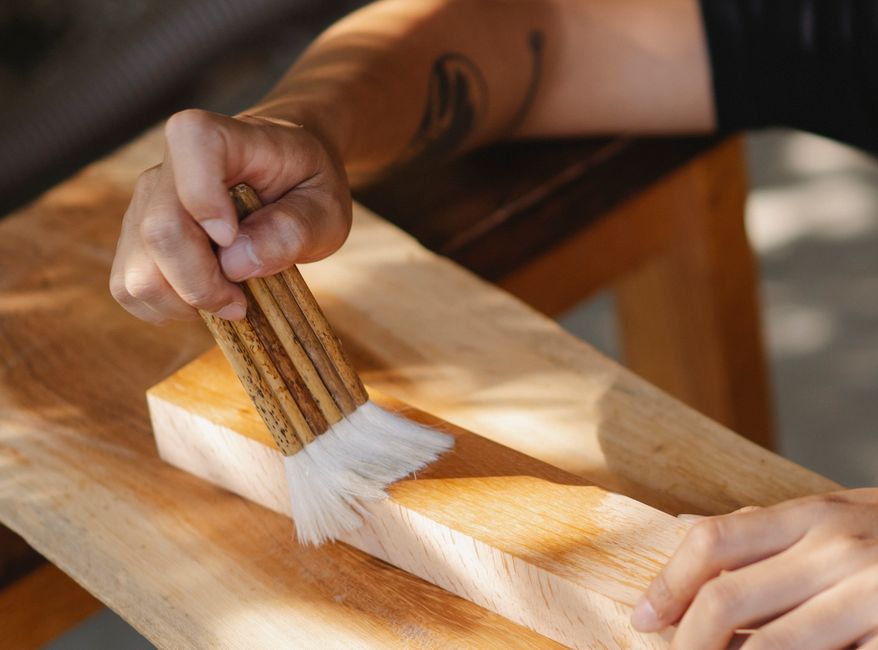
Applying a shellac finish by hand is a time-honored technique that has been used for centuries to bring out the natural beauty of wood. Unlike modern spray finishes, the traditional pad application method allows for intimate control over the process, resulting in a depth and clarity that highlights the grain in a unique way. This article explores the materials, preparation steps, and techniques involved in achieving a deep, glossy shellac finish, as practiced by skilled artisans.
Whether you are a seasoned woodworker or a hobbyist looking to expand your skills, understanding the nuances of shellac application can be a valuable addition to your repertoire. The method, often referred to as French polishing, is not only about applying a coating but also about building a finish that feels like part of the wood itself. In this guide, we will break down the process into clear steps, from preparing the wood surface to the final polishing movements, ensuring you have the knowledge to master this craft.
It is important to note that the quality of the finish depends on several factors, including the type of wood, the ambient conditions, and the skill of the applicator. While this guide provides a solid foundation, individual results may vary, and practice is essential to achieve consistency. The goal is to demystify the process and provide a clear framework that you can adapt to your own projects.
Understanding Shellac and Its Properties
Shellac is a natural resin secreted by the lac bug, and it has been used as a wood finish for centuries. It is available in various forms, but the most common for finishing is flake shellac, which is dissolved in denatured alcohol to create a liquid finish. One of the key characteristics of shellac is its ability to be applied in very thin layers, which is why it is ideal for pad application. These thin layers build up to a finish that is both durable and beautiful, with a warm tone that enhances the wood’s natural color.
Another important property of shellac is its compatibility with many other finishes. It can be used as a seal coat or as a standalone finish. However, because it is alcohol-soluble, it is sensitive to moisture and heat, so it is often used on interior items such as furniture or decorative pieces. Understanding these properties helps in selecting the right shellac for your project and anticipating any potential issues.
Shellac also comes in different colors (often referred to as “cuts” or “dewaxed” types), which can affect the final appearance. For a deep, glossy finish that highlights grain, a lighter cut is often preferred, as it allows the wood’s figure to show through. The choice of cut will also influence the number of coats needed, but the fundamental technique of pad application remains the same.
Preparing the Wood Surface
Before applying shellac, the wood surface must be properly prepared. This involves sanding to a smooth finish, typically progressing through finer grits. Starting with a coarser grit (e.g., 120) and moving to finer grits (e.g., 220, 320) ensures that the surface is free of scratches that would otherwise be visible under the glossy shellac. The final sanding should be done with the grain, and any dust should be thoroughly removed using a tack cloth or a vacuum.
In addition to sanding, the wood should be free of any oils or contaminants. Wiping the surface with a clean, lint-free cloth slightly dampened with denatured alcohol can help remove any residual dust or grease. This step is crucial because any imperfection will be magnified in the final finish.
For porous woods like oak or ash, a grain filler may be necessary to achieve a perfectly smooth surface. This is optional but can be beneficial if you desire a mirror-like finish. The grain filler should be applied according to the manufacturer’s instructions and allowed to dry before sanding again to a fine grit.
Preparing the Shellac and Pad
The shellac finish is applied using a pad, which is typically made of a soft cloth with an inner core of cotton wadding. The pad is used to apply the shellac in a controlled manner, allowing for even distribution and building of layers. To prepare the shellac solution, you can either purchase a ready-made liquid shellac or mix your own from flakes. If mixing your own, it is common to use a 2-pound cut (which means 2 ounces of shellac flakes dissolved in 1 pint of alcohol). This ratio can be adjusted based on the viscosity you prefer.
To assemble the pad, take a piece of cotton cloth (such as an old t-shirt) and place a wad of cotton batting or wool in the center. Fold the cloth over the cotton to form a smooth, rounded pad. The pad should be smooth on the surface that touches the wood, free of any wrinkles or bumps. The size of the pad should be comfortable to hold, and it is traditional to make it about the size of your palm.
Before using the pad, it is essential to moisten it with shellac and alcohol. The pad should be sufficiently wet but not dripping. To test the consistency, you can press the pad on a piece of scrap wood; it should leave a thin, even film that dries quickly. If the pad is too dry, it will drag, and if too wet, it will leave streaks. Finding the right balance takes practice, but it is a key part of the technique.
Applying the Shellac with the Pad
Once the surface and pad are ready, the application process can begin. The pad is moved in smooth, overlapping strokes, typically in a circular or figure-eight motion. These movements help to spread the shellac evenly and avoid visible lap marks. It is crucial to keep the pad moving at all times to prevent it from sticking to the finish. The pressure applied should be light to medium, and the idea is to lay down a very thin film that dries quickly.
The first few coats are often referred to as “sealing coats” and are used to establish a base. These coats are applied with a slightly dryer pad to avoid raising the grain. After each coat, the surface should dry for a short period, and any raised grain can be lightly sanded with a very fine grit (e.g., 400) to smooth it. It is important to sand gently and only between coats, not after the final coat.
As the finish builds, the subsequent coats can be applied with a slightly wetter pad, and the movements can become longer and more linear, following the grain. The number of coats required depends on the desired build and the absorbency of the wood. For a glossy, deep finish, several coats are usually necessary, perhaps 10 to 20 or more. The goal is to build up a film that is thick enough to provide a good surface for polishing.
After the final coat, the finish needs time to cure, typically at least a few days. Once cured, the surface can be polished to a high shine using a mild abrasive compound or a polishing pad with a bit of oil. This step, often called “spiriting off,” involves using a fresh pad with alcohol to smooth and even out the finish, removing any minor imperfections.
Polishing for a Deep Gloss
Polishing is what brings the finish to a high gloss. Using a special French polishing pad, you apply a small amount of oil (such as olive oil or mineral oil) to lubricate the pad, then dip it in a mixture of shellac and alcohol. The pad is moved in long, continuous strokes along the grain, with increasing pressure and speed. This process can be repeated, gradually decreasing the amount of shellac and increasing the alcohol to level the finish.
After achieving the desired level of gloss, a final “spiriting off” is done using a clean pad moistened with pure alcohol. This removes any residual oil and leaves a clean, brilliant shine. It is important to work in a well-ventilated area because alcohol vapors are flammable and can be harmful if inhaled.
The result of this meticulous process is a finish that not only looks deep and glossy but also feels smooth and warm to the touch. The grain is highlighted, and the wood seems to glow from within. While it requires patience and practice, the satisfaction of completing a piece with a hand-applied shellac finish is unmatched, and it is a craft that connects the modern woodworker to centuries of tradition.
It is worth noting that the application of shellac is a skill that improves with each project. The subtle differences in pressure, humidity, and concentration can influence the outcome, but the fundamental principles remain the same. As you gain experience, you will develop an intuitive feel for the process.
Common Challenges and Troubleshooting
Even with careful technique, challenges can arise when applying shellac. One common issue is the pad sticking to the surface, which often happens when the pad is too dry or the shellac has started to dry too quickly. To avoid this, keep the pad moving and adjust the moisture level as needed. Adding a few drops of alcohol to the pad can help re-moisten it.
Another issue is the appearance of streaks or bubbles, which can occur if the shellac is applied too thickly or if the surface is not clean. To remedy this, allow the finish to dry and then sand lightly with a fine grit, followed by applying another thin coat. It is better to apply many thin coats than a few thick ones.
Environmental factors such as temperature and humidity also play a role. High humidity can cause the shellac to blush, a milky appearance, because moisture is trapped in the finish. In such conditions, it is advisable to work in a controlled environment or use a dehumidifier. Conversely, very dry conditions can make the shellac dry too quickly, leading to a rough finish.
If you encounter any issues, it is often easier to strip the finish and start over rather than trying to fix a compromised surface. Shellac is reversible, and it can be removed with alcohol, which is one of its advantages. This allows for correction without damaging the wood.
Maintaining the Shellac Finish
Once the shellac finish is complete, proper maintenance will ensure its longevity. Because shellac is sensitive to moisture and heat, it is advisable to use coasters under drinks and to avoid placing hot objects directly on the surface. Regular dusting with a soft cloth and occasional polishing with a furniture polish that is safe for shellac can help preserve the shine.
If the finish becomes scratched or dull over time, it can be repaired by re-applying a coat of shellac to the affected area and blending it in. Since shellac is compatible with itself, this type of repair is straightforward. However, it is important to test any new finish in an inconspicuous area first.
The traditional method of applying shellac with a pad is a valuable skill that produces a finish of exceptional quality. It requires attention to detail and a willingness to practice, but the results are well worth the effort. For those interested in woodworking, mastering this technique opens the door to creating pieces that showcase the natural beauty of wood in a way that few other finishes can match.